….eggciting week ahead
March 20, 2016
Painting eggs is something of a little hobby which began almost 35 years ago when the process of the dyed Ukrainian eggs was intriguing from an artistic point of view–meaning, the way/how it was done, not the desire to become overwhelmed with making intricate geometric designs. So employing the method of using beeswax to wax over those parts of an egg one wanted kept white, then dropping the egg into coloured dye, again waxing over the area which would retain that dye’s colour, and dropping it into yet a different coloured dye and repeating the process until the entire egg was covered in wax.
At this point, the wax was removed by carefully holding it over a candle flame and wiping the melted wax free with a tissue. Once the wax was removed, the egg was blown of its contents and if being used as a Christmas tree ornament, a string was affixed to the top.
Here is an example…..

Quite a number of years later, the notion of doing away with the dye/wax method in favour of actually painting on the egg’s surface was experimented with. This was successful but a huge breakthrough occurred when moving from painting chicken eggs to painting duck eggs. A duck egg’s surface is not chalky like chicken eggs, but rather satiny smooth and extremely receptive to watercolour. This was discovered while staying in The Philippines, where duck eggs were easily come by.
Painting a duck egg would be done, then the egg would be spray-lacquered so as to protect and seal the watercolour-painted surface. Once completely dry, the insides would be blown out….


……and in honour of the 6th day of Christmas….

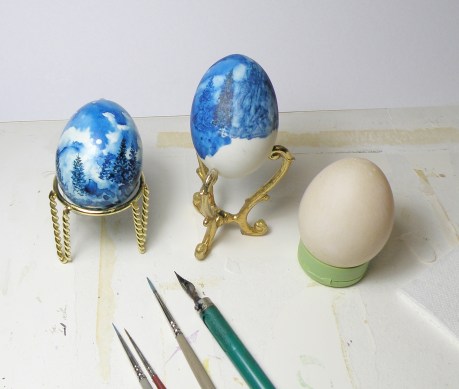
….which brings us to today and trying to replicate a moonlit rocky mountain scene on a duck egg purchased locally ($3.50/half doz) through craigslist and meeting the man carrying his trusty picnic cooler outside the supermarket:
A very Happy and Blessed Easter to all my blogging friends!
